Learn How to Make a Paper Chain Countdown For Any Occasion and help your toddler know when any event is happening.
Is a big day coming up and your toddler keeps asking you when? Let’s make him a paper chain countdown!
Does your toddler constantly ask you these questions:
- Is it my birthday now?
- When is Halloween coming up?
- Is Christmas tomorrow?
- Am I going to school today?
If so, making a Paper Chain Countdown is the best way to help them figure out when these important events happen. Paper Chain Countdowns are constructions of paper used as time learning tolls for preschoolers. The goal is to help toddlers know when an event is going to happen without looking at calendars that are for them too abstract.

How to Make a Paper Chain Countdown?
Let me share with you how to make this easy construction paper learning toll for your little one.
Step 1: Pick the Event
First, pick the event your little one is interested in now. It can be:
- Christmas – yes, a Paper Chain Countdown is a great swap to sugar-loaded Advent calendars!
- Easter
- Their Birthday
- Back to School
- Spring
- Days of School Before Next Holidays
One paper strip equal one day, and you connect as many paper strips you need to match your countdown
Step 3: Count the Days
Now that you selected the event, count the number of days left until the big day happens. This is important because you are going to cut one paper strip per day to make your paper chain. For example, if you start a Christmas paper chain countdown on December 1st, then you need 24 strips for the chain. It means quite a few pages of paper!
Step 4: Gather Material
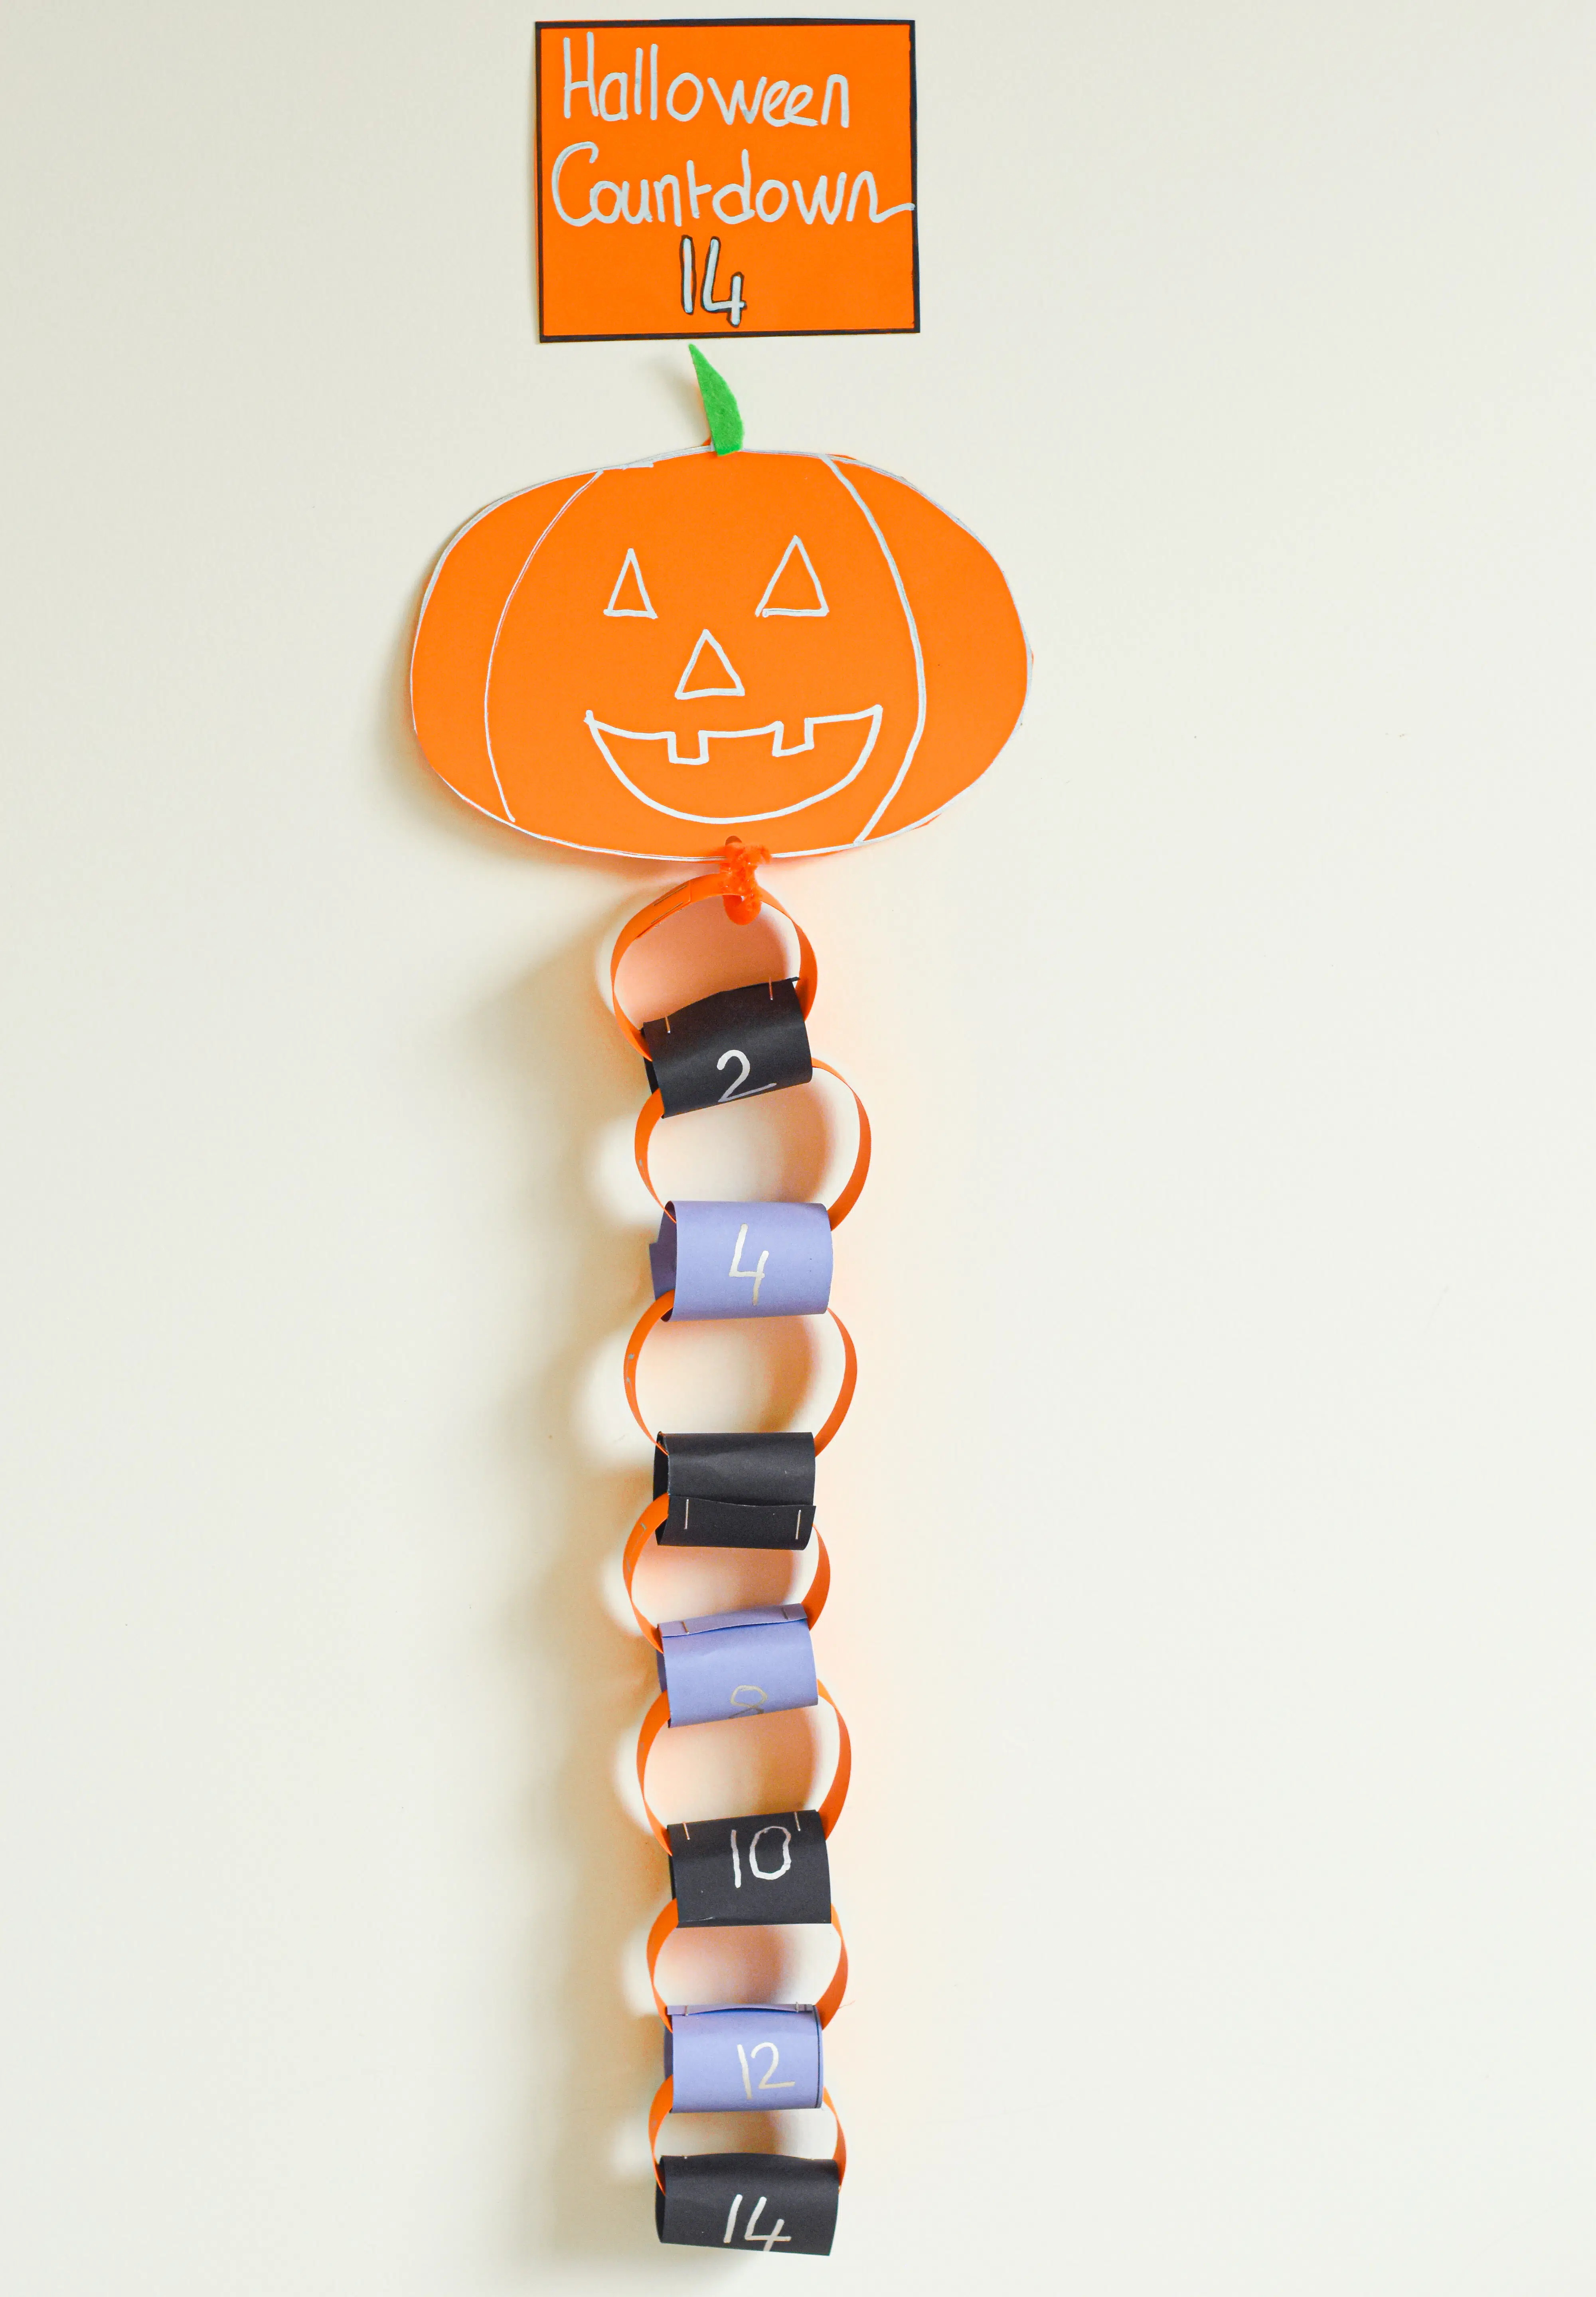
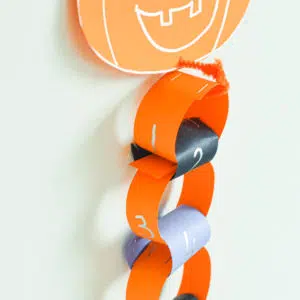
Here I am sharing pictures of our Halloween Paper Chain Countdown. This is what you need to make this:
- Cardboard colored paper – you can also use printing paper, easy to tear off by a kid’s hands but I prefer to use thick paper cardboard as seen in the pictures below. I like the cardboard more because:
- Kids love using a scissor to cut out the paper strip.
- The paper chain is much stronger – I made some with 80-gram printing paper before and my kids always tear off more than a day at a time!
- Permanent marker – to write down the numbers on each paper strips.
- Pipe cleaner or string – to hang on the wall and also to connect the top picture to the chain.
- Stapler – to stick paper links together. You can use tape too if you are working with printing paper.
Step 5: Build It!
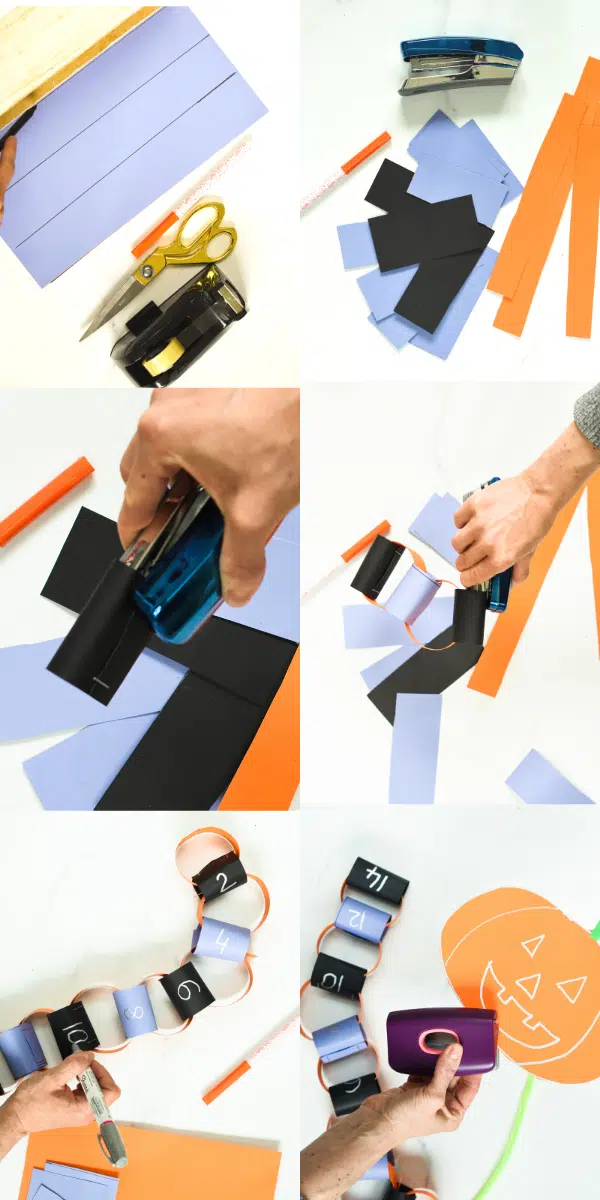
Now it’s time to make the paper chain! To do so, cut paper strips from your cardboards.
- Cut two lengths of paper strips: Short Black strips: 11 cm x 3 cm (4.3 inches x 2.4 inches), Long Orange strips: 22 cm x 6 cm (8.6 inches x 1.2 inches)
- Next, connect a small paper strip to the large one and use a stapler to seal as seen below. Repeat until all the paper strips are attached together.
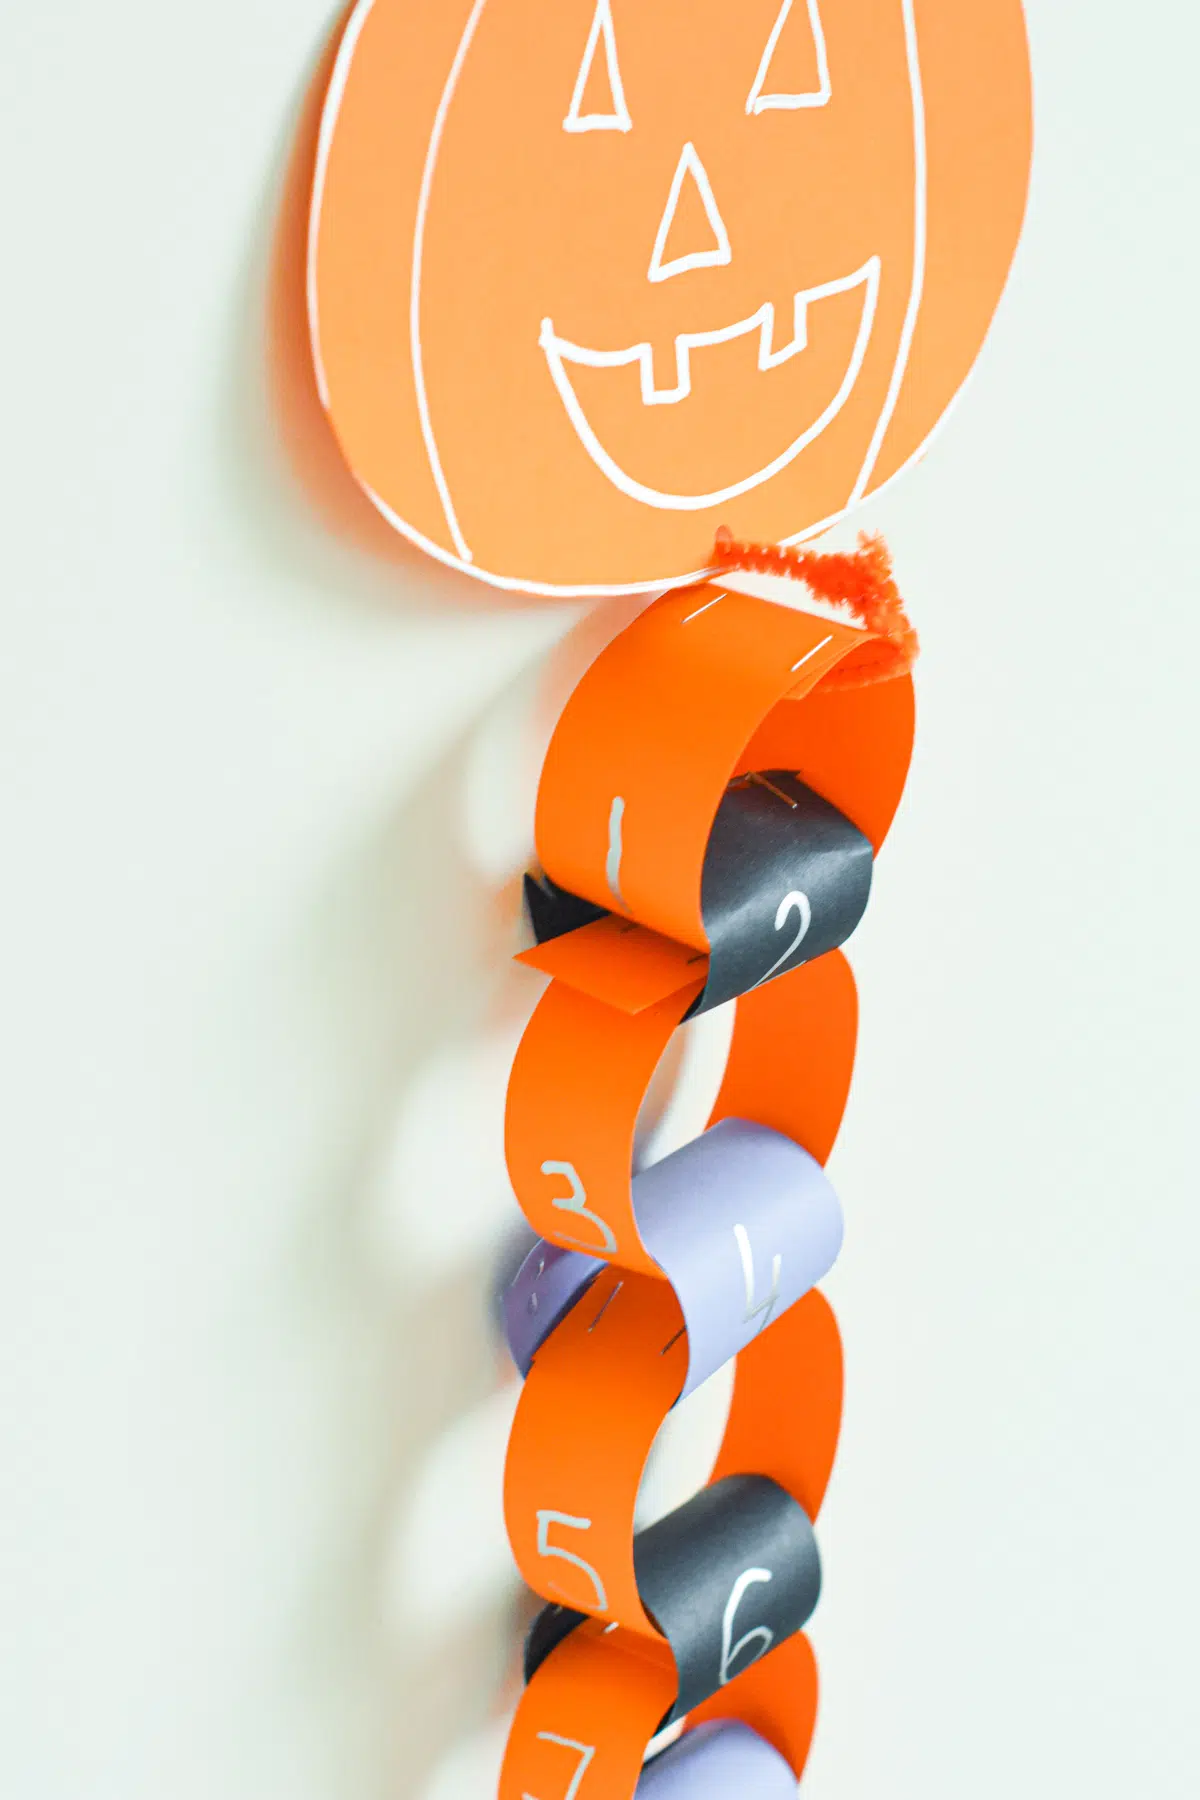
- Then, use a permanent marker and start writing number 1 on top of the chain – we are counting down the number of days left until the events.
- Finally, draw and cut a picture that tells the kids what this paper chain is all about.
- I made a pumpkin shape out of orange cardboard, then I used a hole puncher to pierce the bottom of the pumpkin.
- In the hole, I placed a piper cleaner to link the paper chain to the pumpkin shape.
Step 6: Have Fun!
Finally, I placed the paper chain on the wall for the kids to use. Each morning, they used kid’s scissors to cut out one of the paper strips. No more paper strips? Hooray, the big day is here! Let’s have fun!
I hope you enjoyed this fun kid learning tool that also involves basic paper construction skills.
Paper Chain Countdown
Equipment
- Pair of scissors
- Stapler
- Permanent marker
- Hole puncher
Materials
- 1 Colored Thick Paper
- 1 Pipe Cleaners
Instructions
- Count how many days are left until the big day – one day = one paper strip.
- Now, cut paper strips from the colored paper you choose – I chose three colors for Halloween orange, purple, and black. I like precision, so I cut short Black strips: 11 cm x 3 cm (4.3 inches x 2.4 inches) and Long Orange strips: 22 cm x 6 cm (8.6 inches x 1.2 inches).
- Now, use the stapler to form a tube shape with the first paper strip. Look at my step-by-step pictures above in this post for visual help.
- Next, link the paper strips together and seal them with the stapler.
- When the chain is down, write numbers on it, number 1 goes on top of the chain.
- Draw and cut out a shape to hang on top of the chain – I made a pumpkin for Halloween. It can also be a birthday cake, Santa, or school-related pictures.
- Connect the picture and paper chain using a pipe cleaner. I punched a hole in the bottom of the pumpkin with a hole puncher.
- Each day, ask the kids to cut a paper strip from the chain. The number of strips left is the number of days left until the big day!