Have fun making these Paper Plate Halloween Crafts ideas with your toddler this Halloween! Prepare the paintbrushes, paper plate, scissors, and be ready for 30 minutes of fun sensory play activity with your little one.
Last time we shared our cool Halloween Toilet Paper roll craft ideas, and you love it, so time for more kid craft fun with these paper plate crafts ideas. We worked on three toddler craft activities here:
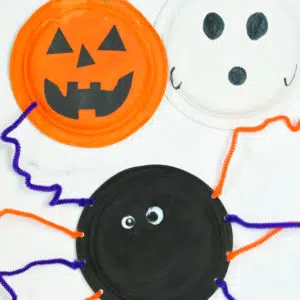
- Halloween Spider Craft
- Halloween Pumpkin Craft
- Halloween Ghost Craft
Material Needed
Obviously, you need paper plates for this activity. There’s different paper plate shapes and style, I like the one with a flat border, not crinkled, it looks cuter when you make paper plate craft activities of any kind.
Other things we used here are:
- Acrylic Paint – water paint works as well, but it doesn’t quite cover the paper plate.
- Felt Paper – we used this for the pumpkin stem.
- Pipe Cleaners – or chenille stem for the spider legs.
- Hole Puncher – this is what we used to make holes on the side of the plate and fit the spider pipe cleaner legs.
- Googly Eyes – for the spider.
- Glue – you don’t need a glue stick. We used a school glue stick, which worked very well.
- Black Thick Paper – to cut out the pumpkin eyes and mouth shape.
- Paintbrushes
- Scissors
How to Make Paper Plate Halloween Crafts
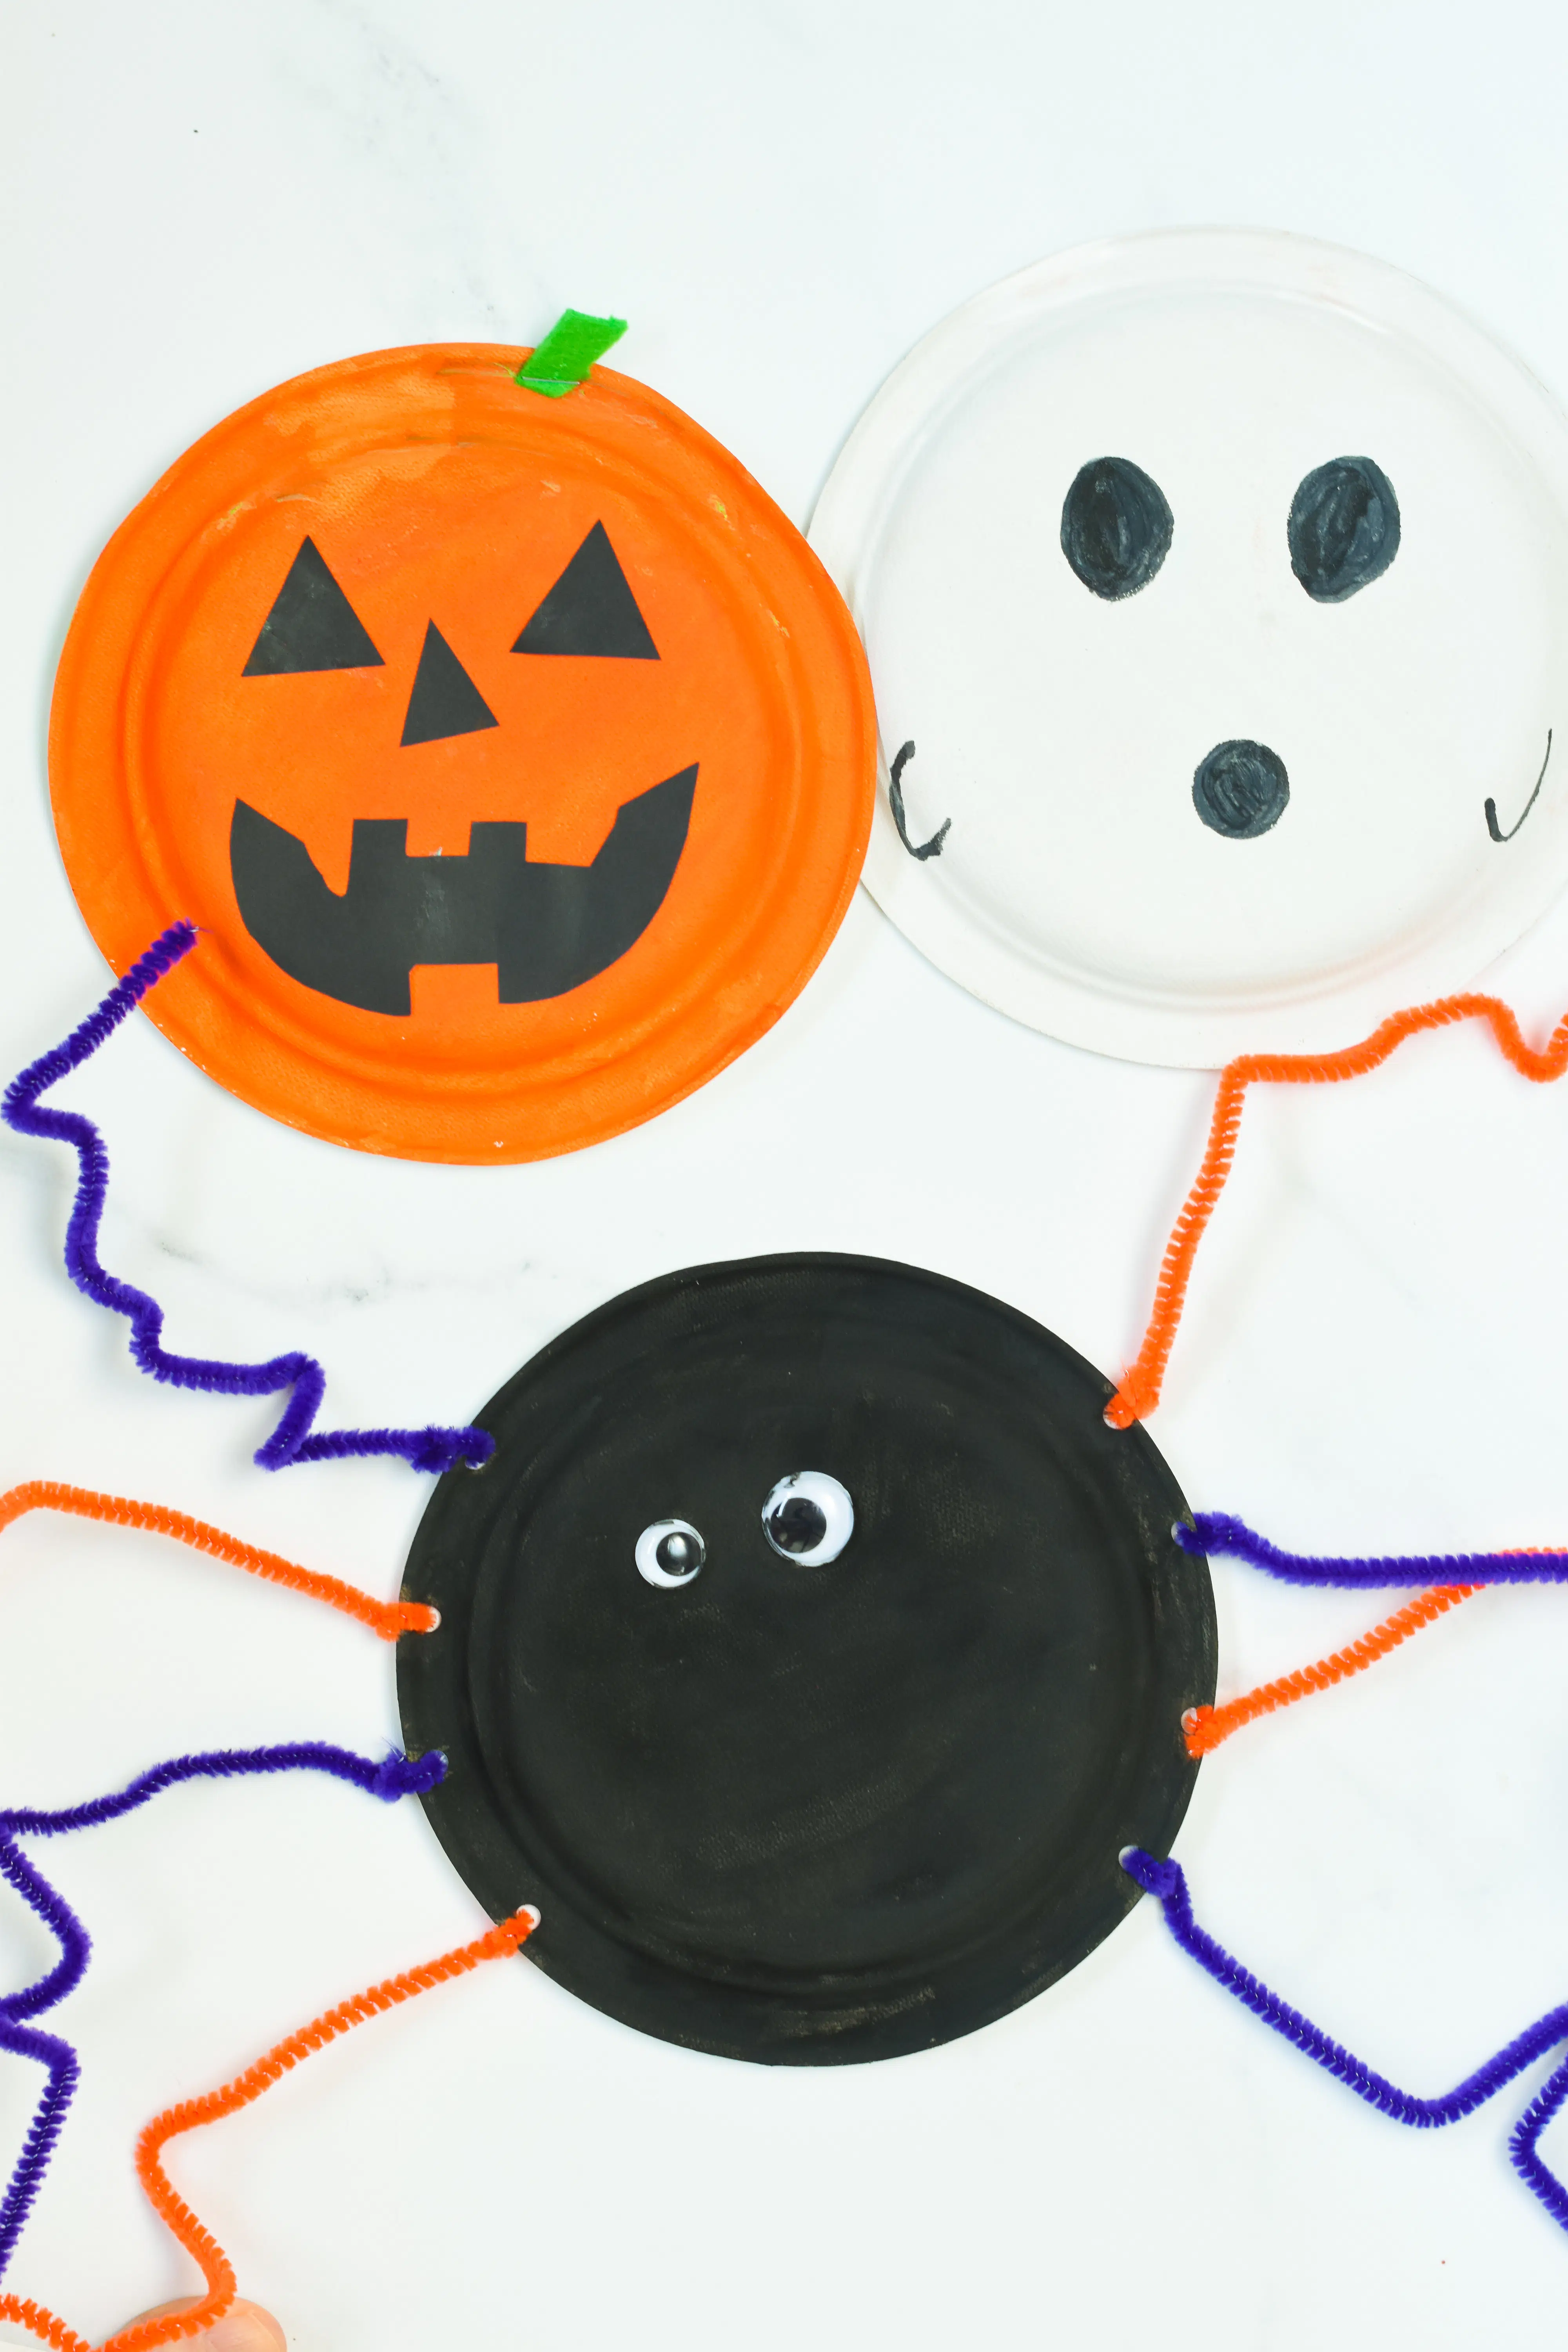
- First, pick a Halloween character from the ones below. We made a pumpkin, my 4-years-old favorite, and a ghost and a spider, my 8-year-old favorites.
- Now, paint each plate using the color that matches the Halloween character you want to make. Next, air-dry the plate for 30 minutes or outside if sunny. When the paint has dry time to add the fun pieces to your Halloween art pieces.
Decorating
The fun part is to decorate your paper plate and bring them to a real Halloween character!
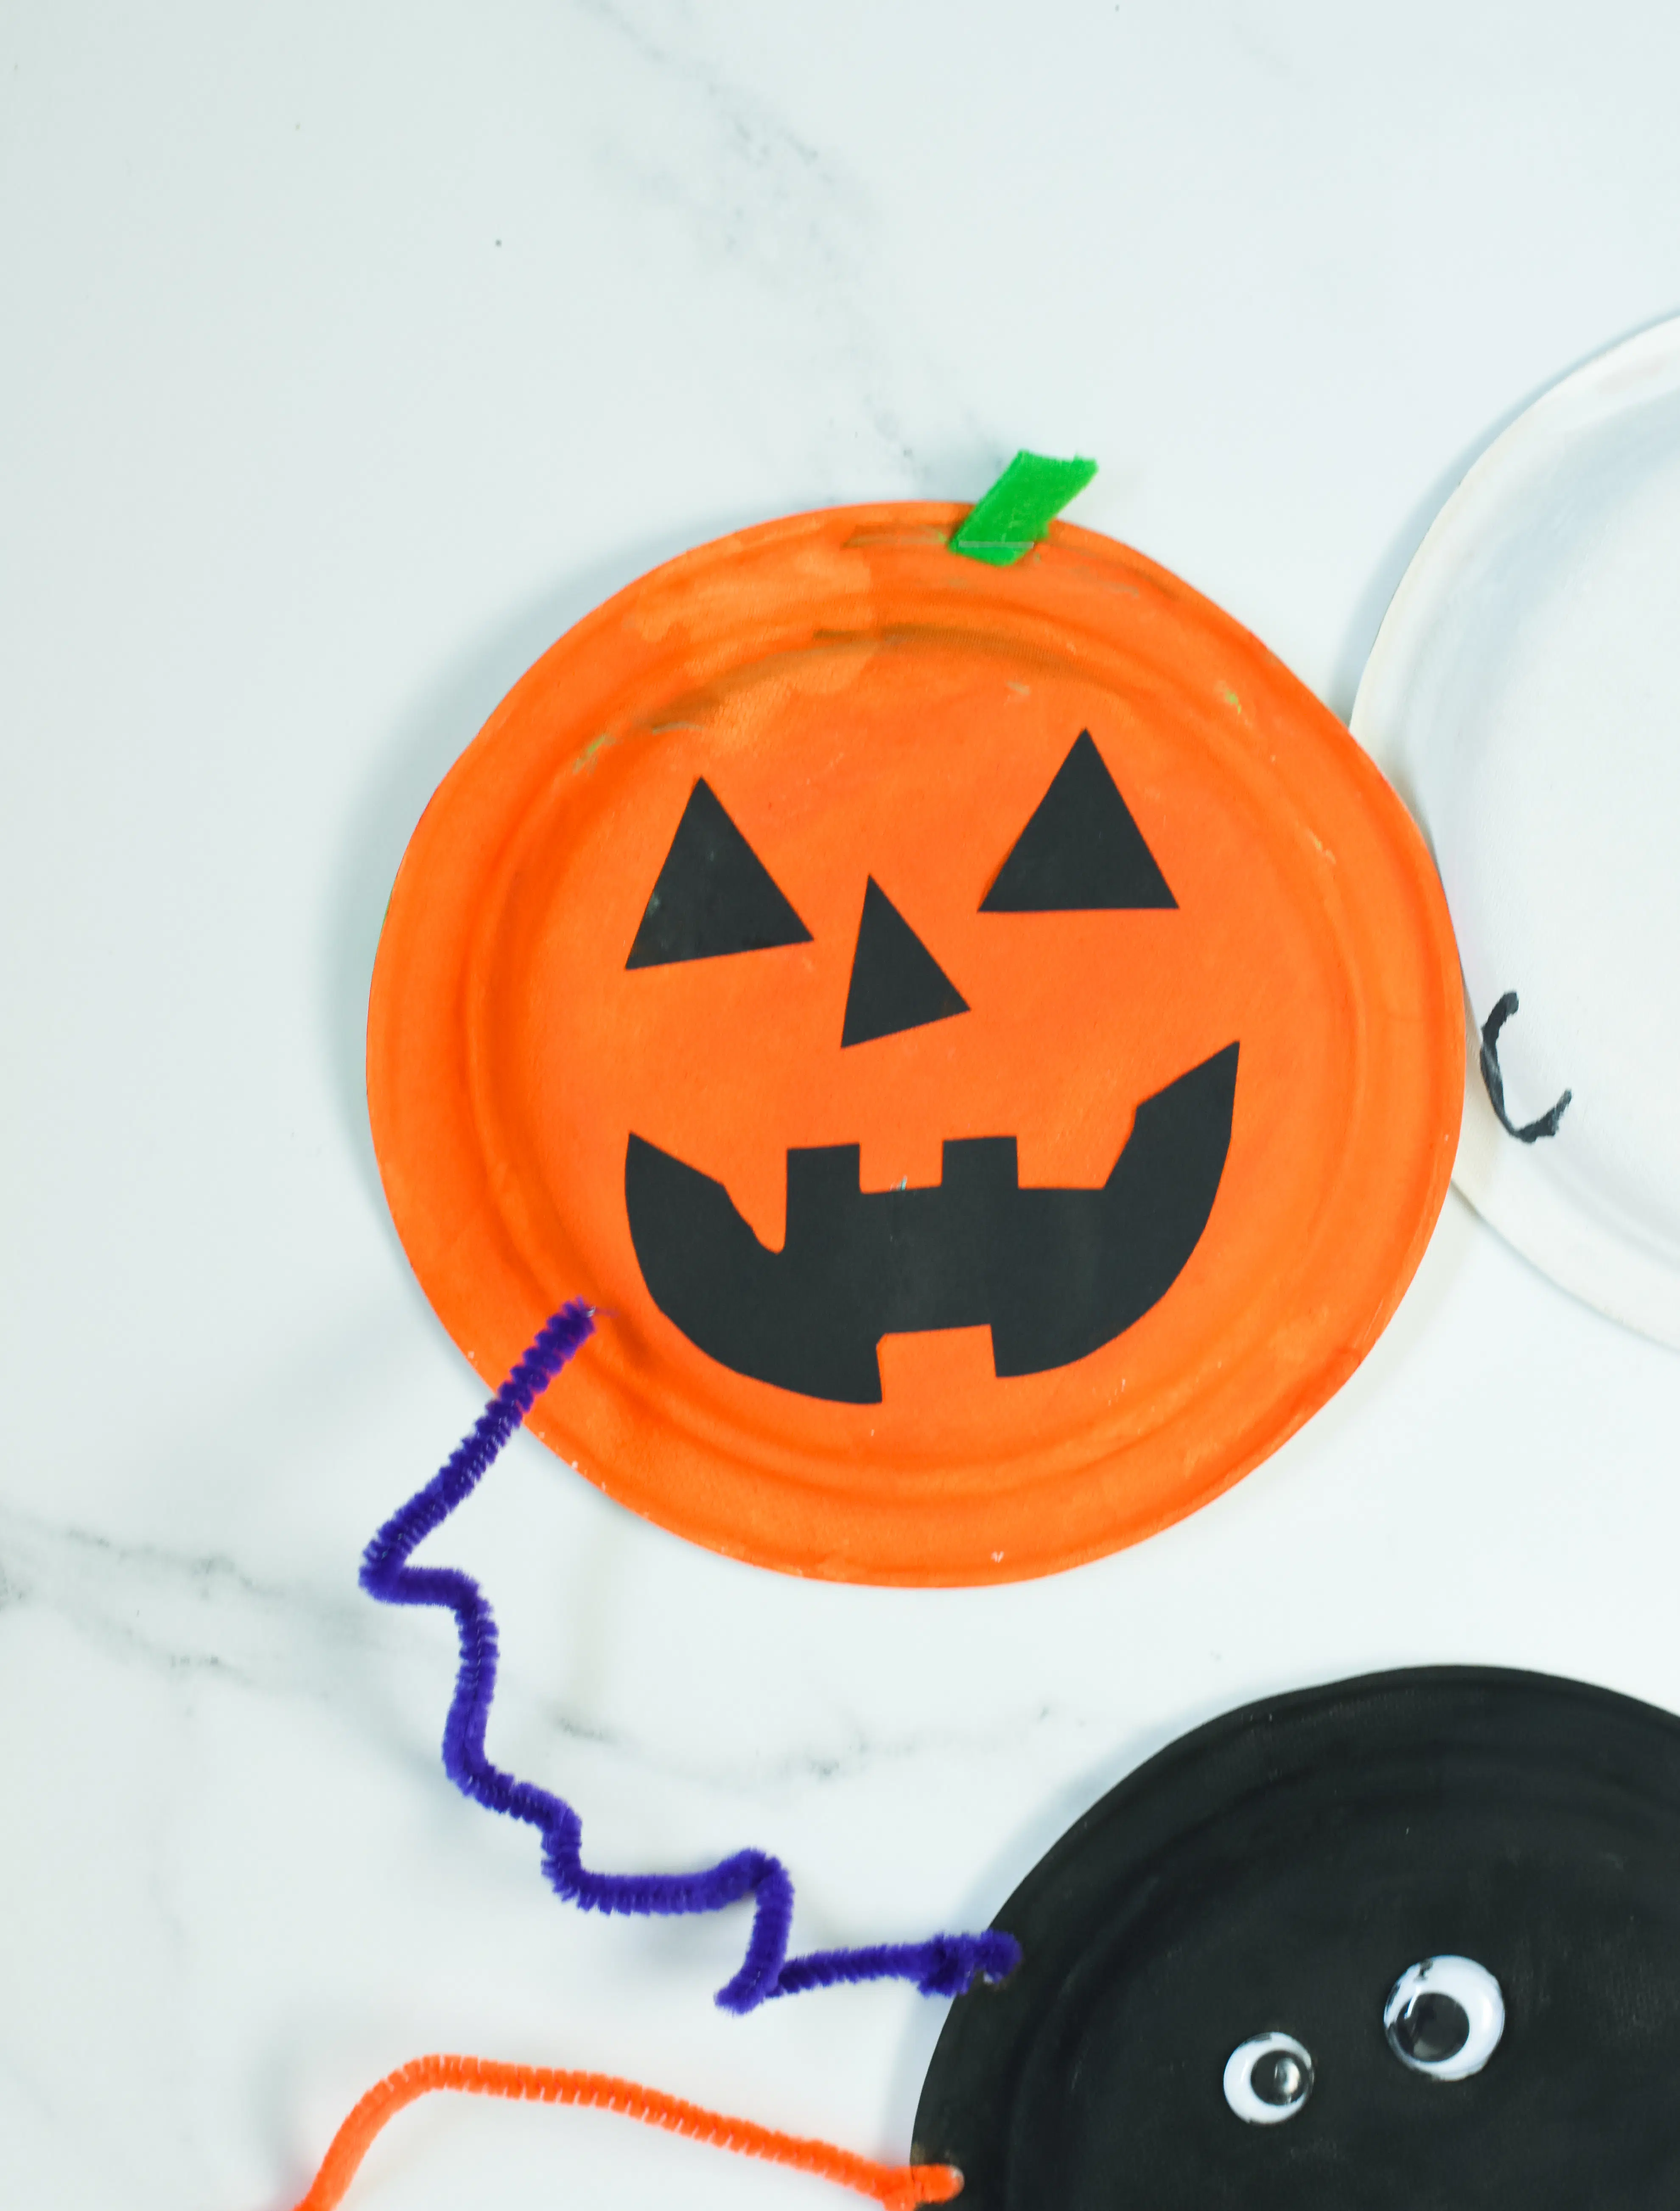
Pumpkin Paper Plate
For the Halloween pumpkin craft activity, cut out a piece of green felt into a curly shape. Staple the pumpkin stem on top of the plate. For the eyes and mouth, draw triangle shapes for eyes and nose. For the mouth, try to copy the shape seen on the picture or just be creative. Finally, glue the black paper shapes with school glue, and that’s it!
Ghost paper plate
For the Halloween Ghost craft activity, we used black acrylic paint to paint eyes and noses.
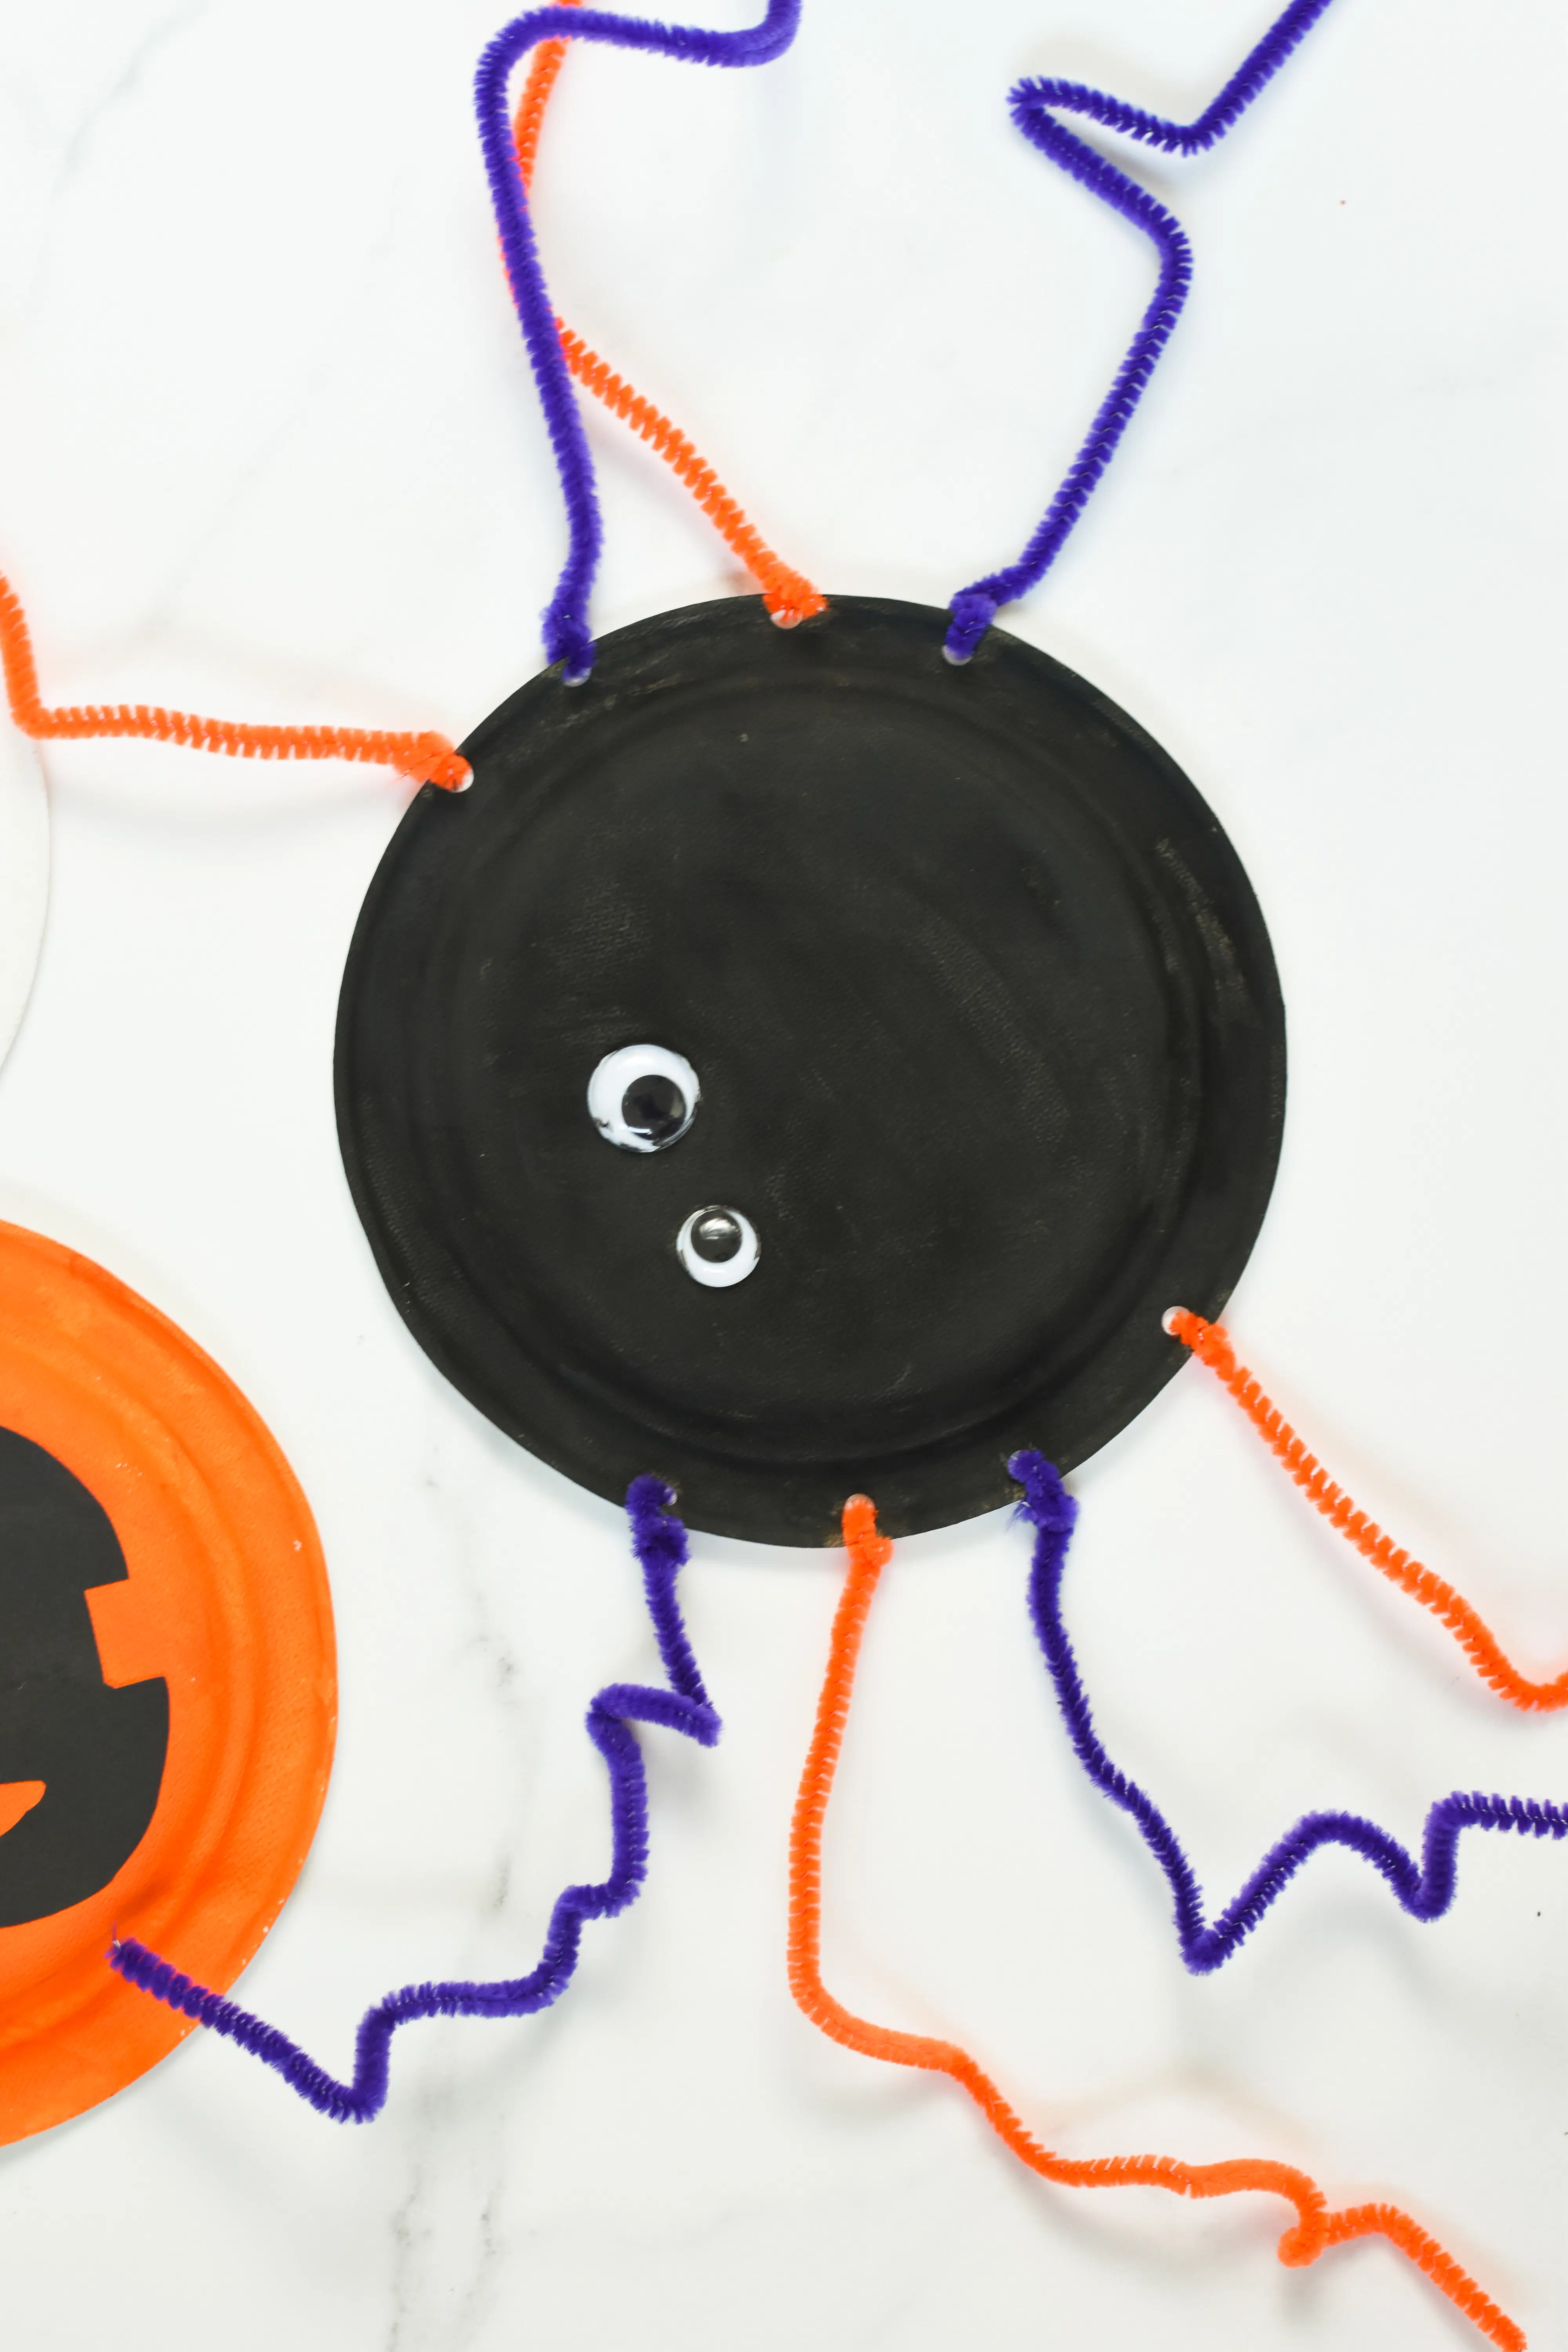
Spider paper plate
For the Halloween Spider craft activity, use a hole puncher to pierce 4 holes on each side of the plate. Then, place a pipe cleaner in each hole and twist it to hold to the plate. I cut the hanging part that are pointy and unsafe for little ones.
Finally, for the spider eyes, we used school glue to glue the googly eyes.

What to do with Halloween Paper Plates
These 3 Paper Plate Halloween Crafts activities are perfect to decorate your windows on Halloween or front door. We used strong transparent tape to stick them to the windows. You can also make a Halloween garland with your plate. Connect the plates using a lovely orange string. Use your hole puncher to pierce holes on top of each plate and go through each hole with the string to make the garland.
More Halloween Activities for Kids
Below I listed more art and craft for kids activities to make for Halloween:
Paper Plate Halloween Crafts
Equipment
- Paintbrushes
- Kids Scissors
- Hole puncher
Materials
- 3 Paper Plates
- 1 Water Paint orange, white and black
- 2 Googly Eyes
- 1 Thick Black Paper
- 8 Halloween Pipe Cleaners – we used purple and orange chenille cleaners
- 1 School Glue
Instructions
- Pick the Halloween paper plate characters you want to make. Then pick the paint color that matches the plate: orange for the pumpkin, black for the spider, and white for the ghost.
- Paint the entire plate and let it air dry for at least 30 minutes.
- When dry, decorate as below.
Halloween Pumpkin Craft
- Cut out triangle shapes from a thick black paper board to make the pumpkin nose and eyes. Then, cut the mouth shape as seen in the pictures above, or be creative!
- Glue the shapes with school glue on the painted paper plate.
Halloween Ghost Craft
- Use a permanent black marker or black paint to make the eyes and nose.
- Use a hole puncher to punch 4 holes on each side of the black paper plate.
Halloween Spider Craft
- Place on pipe cleaner in each hole, twist the end to hold to the plate.
- Glue 2 googly eyes using school glue.