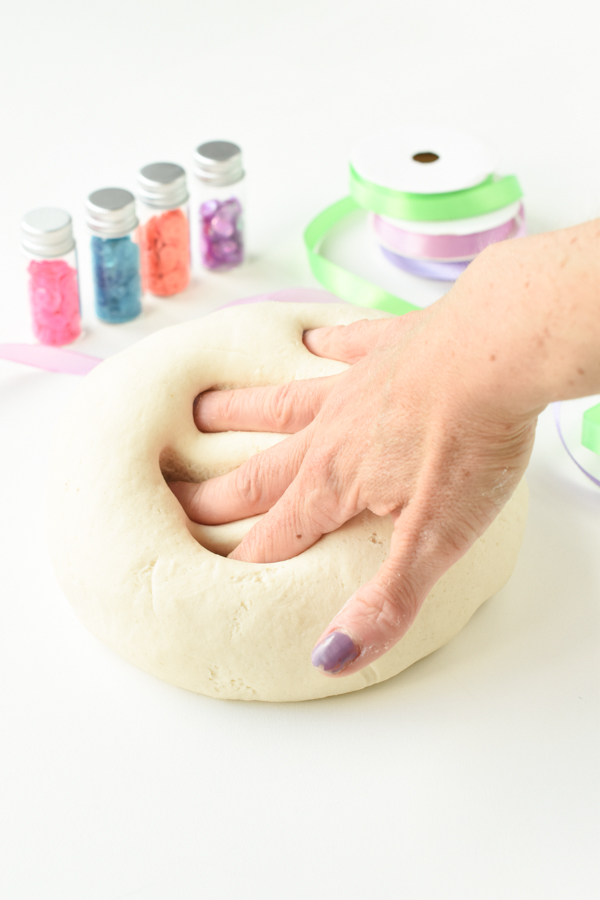
The 3-Ingredient Salt Dough is made with in only 10 minutes, and that keeps kids busy on rainy days for hours! The perfect salt dough to craft ornaments, handprints, or a salt dough volcano!
Ingredients and Substitutions
The ingredients you need to make this easy salt dough recipe are:
- Flour – all-purpose flour, not self-raising flour, or the dough would puff up in the oven. For kids with gluten allergies, you can use all-purpose gluten-free flour, make sure the blend contains gum, or the dough wouldn’t hold as well.
- Lukewarm water – use water from the tap, the same temperature you would use for a baby bath, about 37C/98F.
- Table salt – this is the fine slat used in your kitchen, don’t use coarse salt.
How To Make Salt Dough
It’s super easy to make salt dough for kids at home. All you need are 3 ingredients that we all have in the pantry and a little bit of patience to knead the dough to create a salt, rollable salt dough. Below are the steps to follow to make this easy salt dough recipe, including tips to troubleshoot your dough. For the full recipe, simply jump to the recipe below.
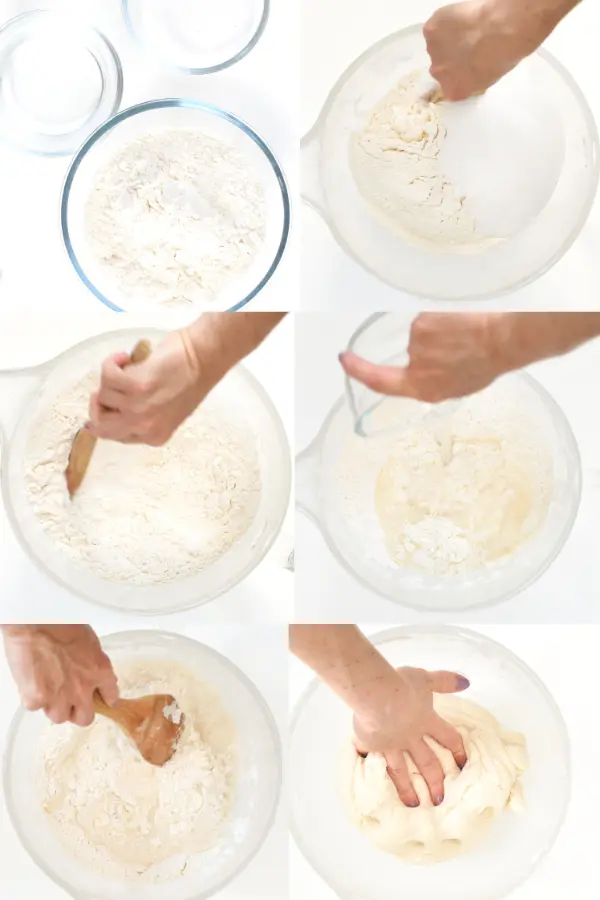
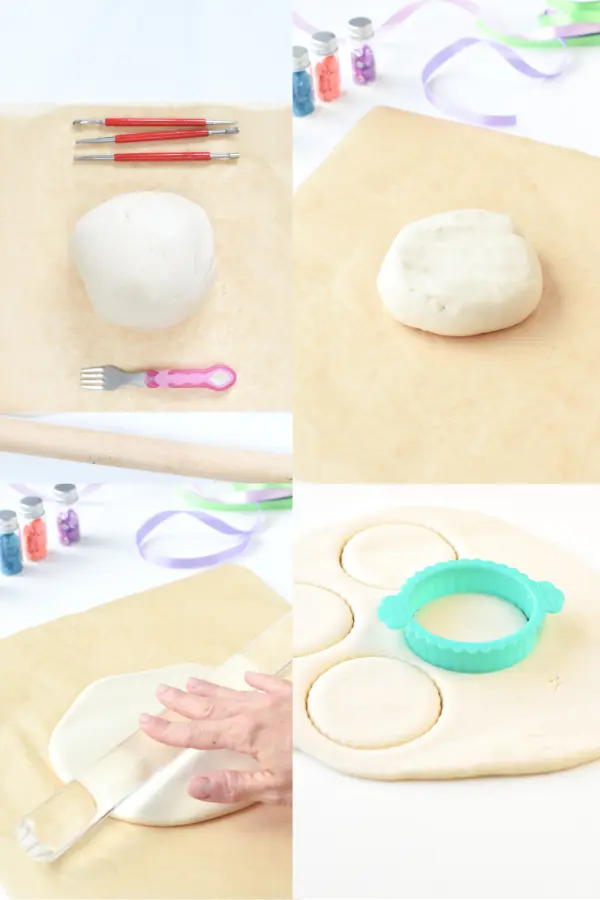
- In a large bowl, stir flour and salt. Make a well in the center of the dry ingredient and add the water, preferably lukewarm, to make it easier to combine. If you want to add a nice smell to your dough, do it now by adding essential oils or a natural extract.
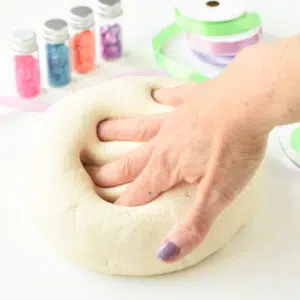
- A salt dough requires 5 minutes of kneading to bring all the ingredients together and form a salt dough. You can do this in a stand mixer or by hand on a floured surface. If the dough is sticky, dust more flour on it. If the dough is dry or breaks into tiny pieces, add a few more tablespoons of water, 1 at a time, and knead to combine.
- Depending on the rolling pin you are using, you may have to roll your salt dough between two parchment paper pieces to prevent marks from the rolling pin.
- You don’t want to make salt dough handprint ornaments that show tiny lines or spots. Otherwise, if you have a silicone rolling pin, you don’t need the paper.
- Roll into a 1/4-1/2 thickness. The thinner, the faster it bakes. But also, if your dough is too thin, you won’t be able to press your kids’ hands without breaking the dough. So adjust the thickness based on what you want to create.
- My recommendations are for salt dough creations and ornament: 1/4 inch thick. For handprint creations: 1/2 inch thick.
- Use cookie cutters to cut out lovely shapes from the rolled dough. For handprints, use your kid’s hand as a guide. You want to leave about 0.6 inches free on the edges.
- This free space is also useful to make a small hole using a straw, and then hang your creation on a wall or Christmas tree.
- I recommend air-drying the salt dough overnight or for 2-3 days before baking. This is especially useful for thick or large creations (1/2 inch thick/superior to 5cm in diameter).
- After that time, bake the dough on a baking sheet covered with parchment paper. Preheated the oven to 250F and bake the dough for 60-90 minutes until hard and white in color. The baking time depends a lot on the thickness and size of your creations. Cool down on a rack for 3 hours before decorating. You can paint your cooled decoration using acrylic paint, sparkles, or glue some sequins on it.
- Now that you have painted your lovely salt dough craft ideas make it last forever!
- Brush some Mod Podge or varnish on top to protect the paint and the dough from the air. Store the creation wrapped in paper in an airtight container in a dry cold room.
Adding Fragrance
Salt dough doesn’t have an attractive smell, and you can adjust that by adding:
- 1/4 teaspoon of essential oil in the water – lavender, orange, eucalyptus.
- 1/2 teaspoon of ground cinnamon – perfect for the Christmas season and create cinnamon salt dough for Christmas ornaments.
- 1/2 teaspoon of vanilla extract or almond extract – to bring out a biscuit flavor and perfect for holiday ornaments like these Easter egg salt dough ornaments.
Using Salt Dough
You can use this salt for for any of the following activities with your busy little kiddies:
- To make Easter Decorations
- To make Dinosaur Fossils
- A salt dough volcano
Frequently Asked Questions
You must use table salt in a salt dough recipe. It’s the thinner salt available at the grocery store, which blends perfectly into the flour. Don’t use coarse sea salt or Epsom salt. It won’t dissolve with the water, and the dough will be grainy and not dry in the oven.
I recommend using lukewarm water from the tap. Think bath temperature about 37C/98F. Don’t use boiling or very hot water in salt dough recipes. In fact, if the water is too hot, it activates the gluten in the flour even more, and the dough becomes very sticky.
Salt retains the water in salt dough, and it’s the ingredient that makes the dough harden and lasts for long. You can’t make salt dough without salt, or it won’t last more than a few days. Then, it will soften and get moldy like a cookie.
Sometimes salt dough puffs up in the oven. This happens mainly because the oven is too hot or the oven is on fan-forced mode. Another reason might be that you used self-raising flour. It contains baking powder, a raising agent that puffs dough. Reserve this self-raising flour for baking kid’s muffins, not for playdough recipes or salt dough recipes.
To decorate salt dough, it’s better to use a high-covering paint that won’t crack after it dries. Therefore, acrylic paint is the best choice to paint salt dough ornaments. Always paint cold ornaments that have been baked and cooled for a few hours. Don’t hesitate to apply several coats of paint to pop out the colors.
When your paint is dry, seal your salt dough decoration with Mod Podge or a water-based varnish. Depending on the finish you want, you can use a glossy or matte varnish. To store salt dough decoration for the next year, wrap in newspaper or fabric and place in a sealed box in a dry, cool place.
More Dough Recipes


3-ingredient Easy Salt Dough Recipe
Instructions
- Preheat the oven to 250°F (120°C) in conventional mode, not fan-forced.
- In a large bowl or the bowl of your stand mixer, add flour and salt. Give a good stir.
- Make a well in the center of the dry ingredients and pour the lukewarm water.
- Stand mixer: start kneading the dough with your stand mixer's hook attachment on speed 3 for 5 minutes. The dough is ready when it forms a ball, and it doesn't stick to the sides or bottom of the bowl. If it does, dust more flour until the dough is soft and consistent.
- Hand mixing: start stirring the dough with a silicone tool then, when it starts to be difficult, knead by hands for 1 minute in the bowl, then keep kneading on a lightly floured surface for 4 minutes until the dough is soft, white, and doesn't stick to your fingers.
- If the dough is too crumbly, add a splash more of water, adding 1 tablespoon at a time. On the other hand, if it's too wet, dust some extra flour on on the dough and knead to incorporate.
Rolling salt dough
- Divide the dough ball into 4 smaller balls. It's easier to roll small quantities.
- Roll between pieces of parchment paper to avoid transfer marks from the rolling pin to the dough – this happened more with wooden roller pins. If you have a glass or silicone rolling pin, you don't need the paper.
- Roll into a thickness of about 1/4-1/2 inch thick. The thicker the dough is, the longer it bakes, but for handprints, it's better to have a thicker dough, or the handprint won't show very well.
- Cut out round pieces of dough with a cookie cutter and then use the piece of salt dough to make handprints, dinosaur fossils, or ornaments of choice.
Drying salt dough
- For thick ornaments or handprints, leave them dry at room temperature overnight or for 3-4 days before transferring in an oven. Make sure the room is not too humid, or the dough will soften.
- If your creations are small in size (less than 2 inches in diameter) and not too thick (1/4 inch thick), you can bake them immediately.
Oven baking
- Transfer your creation on a baking sheet covered with parchment paper and bake for about 90 minutes, checking every 20 minutes after 60 minutes of baking time to see how the drying process goes. The dough should become white and harden on the edges first, then in the center.
Painting
- Cool down for 3 hours on a cooling rack before decoration with acrylic paint.
- Dry the paint and seal the creation with Mod Podge to protect it from the air and keep in for years.